WordPress , it is growing with unbeatable pace , but the saddest part of WordPress for all beginners is that it is not free , although we can install WordPress for free, but the cost of domain and hosting also needs to be considered. Popular website like hostinger offer free hosting here are it’s specifications
2000MB Space , 100GB Traffic ( PHP and MySQL, Site Builder )
and the best part No Ads or Banners !
Did you know ?
In 23 hrs WordPress 4.3 had over 1.6 million downloads and their are yet being counted !
That is how we can get free hosting , but what about domain you can either go with sub-domain offered by Hostinger else buy a domain name and get your blog started.
If you are seriously into blogging i suggest you to get a domain as when it come to performance and SEO domain proves to be surely better !
Confused how to select a domain ?
check this out :
5+ Must use domain name suggesting tools for your next website !
How to buy a cheap/FREE domain ?
Among all domain name extensions .com prove to be the best one , but if want to go with .net or any ccTLD like .in that’s not a big issue ,You can go with it too.
Some websites also provide free .tk and other TLDs, that can also be used temporarily in place of a .com domain.
If you want to go for .com or any other extension GoDaddy is best to go with,It has everything which is expected by a normal customer – Good support and simple transaction and domain management & the best part it always has a running offer for .com domain i.e it never cost more than 2$ for 1st year on godaddy !
You can check Godaddy.com offers on :- https://www.retailmenot.com/view/godaddy.com
and in.godady.com (GoDaddy India) offers on : https://www.coupondunia.in/godaddy
Also currently Rs 99 offer is running on GoDaddy check it out here : GoDaddy current Aug 25 offer !
How to Register a domain ?
- Visit to GoDaddy offers’ page and type the domain you are interested to buy.
- Select the additional offer you are interested in ( OPTIONAL )
- Pay the amount VIA various payment routes like DEBIT / CREDIT card etc.
- Wait until your domain setup is done usually done instantly.
I have a domain I registered a long ago and I will go with it for this tutorial !
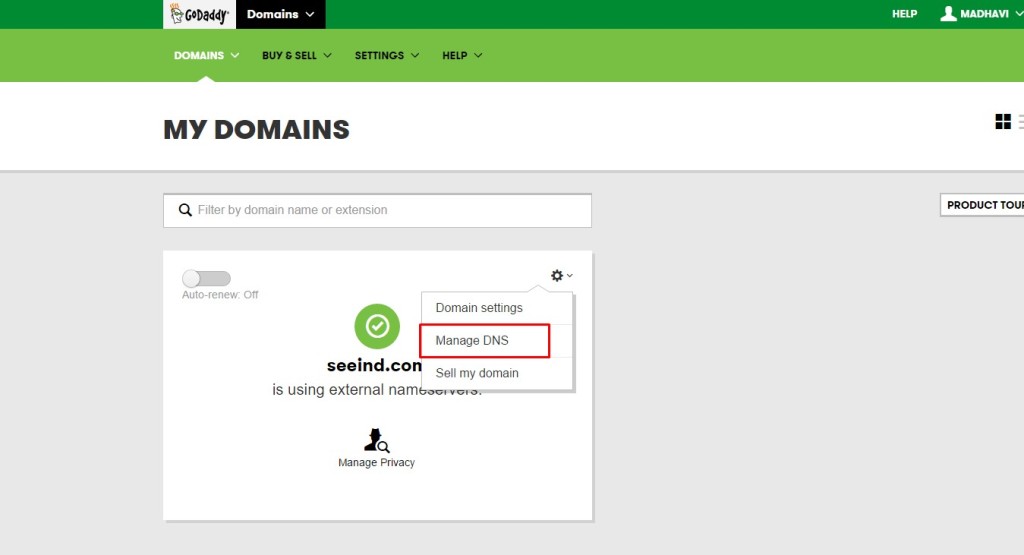
Before we can move further just open manage DNS , in one tab of your browser . Here are short steps to do so .
- login to GoDaddy account
- Go to Domains > All Domains / My domains
- Click over manage DNS as in image .
 4. Now leave this open in a Tab And open a new Tab
So before we can move further in GoDaddy first create a account with Hostinger ( I am going with hostinger.in , it depend upon to chose between Different regional websites of hostinger like hostinger.com.br to make sure which one is best for you go to hostinger.com and choose your region !
- Fill out all the details and SignUp
- Now click on Build new website or go to this link :- https://cpanel.hostinger.in/order/accounts-list ( may differ )
- Click on Create New hosting account .
- Choose Free Plan
 IF you want to go with sub-domain you can Skip all these steps and also you have no need to update your name server kinda. You can directly skip to How to install word-press Below .
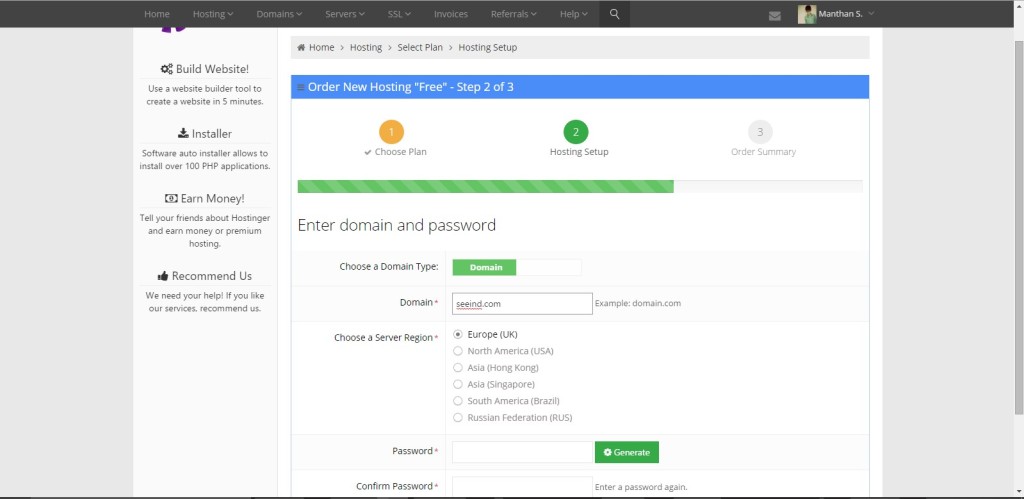
 - Now select for domain or Sub domain if you are going for domain type the domain you just bought with godaddy , else go for sub domain and choose a free hostinger extension .
- Choose the Server Region that’s near to your country .
- Choose password for you hosting website
- Click next and conform you are not a robot ! Absolutely you are not, huh!
- Wait until your account is setup .
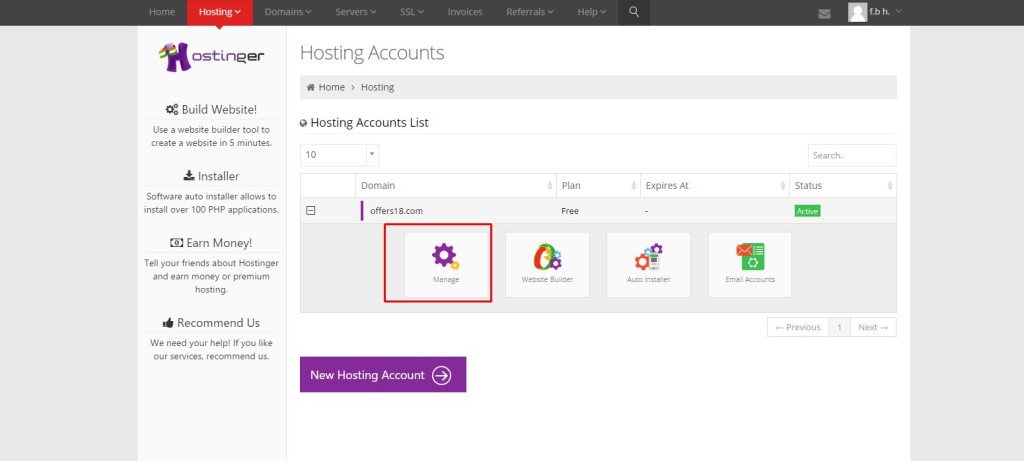
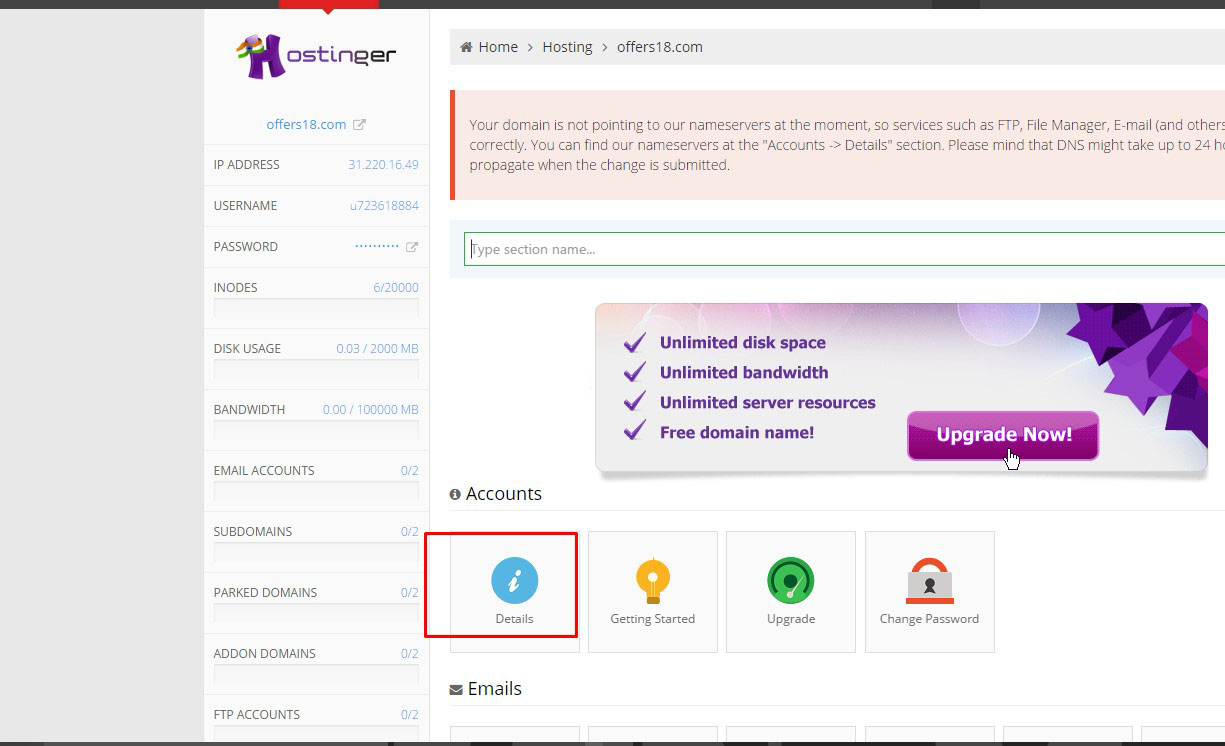
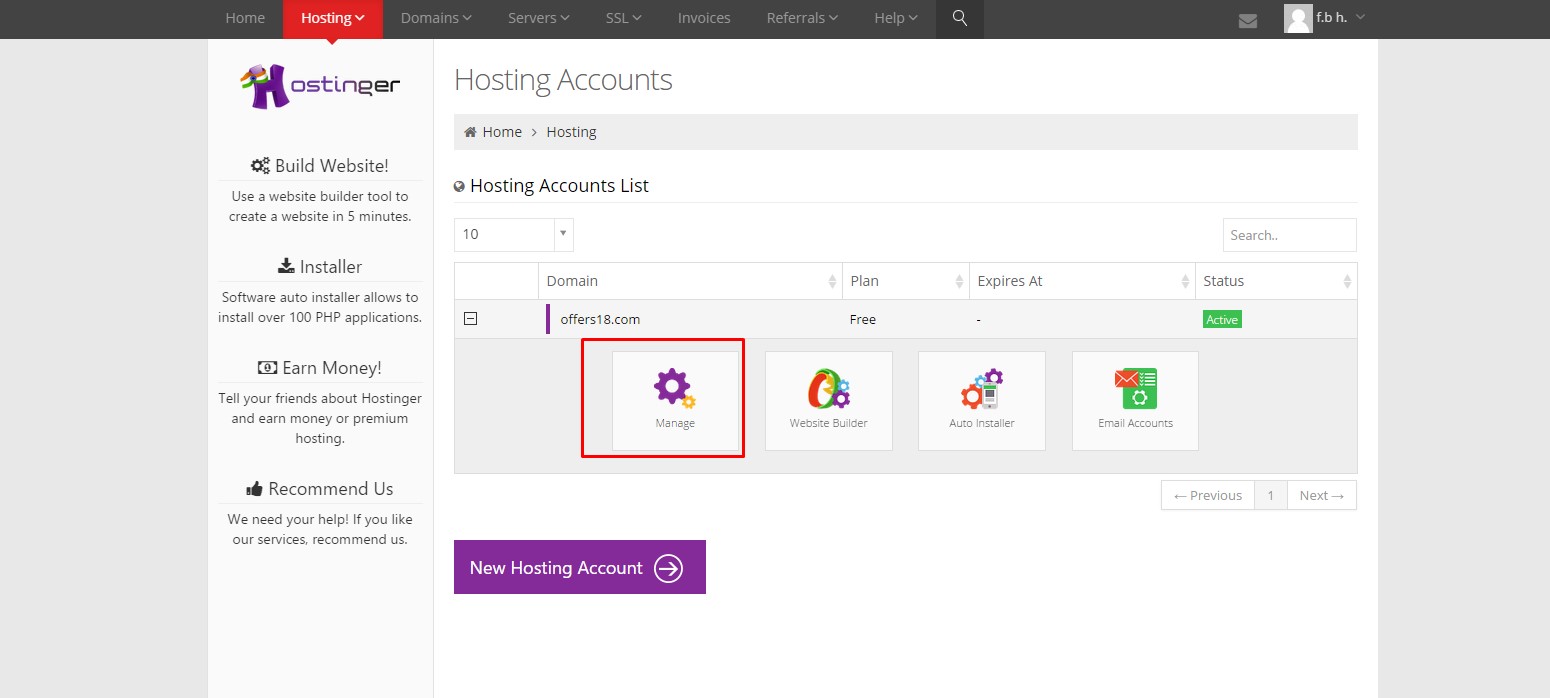
- Now Before you can actually configure your account to use WordPress we need to point our domain to hostinger & for that first of all GO to hosting > all accounts > and click on manage
- Now go to Accounts Section and click on Details
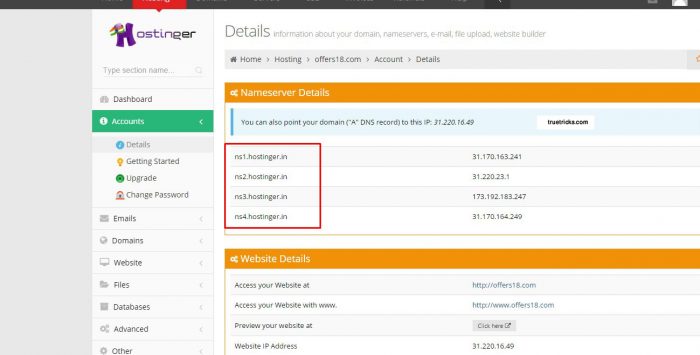
- NOW you will get a list of Name servers in Name server Details .
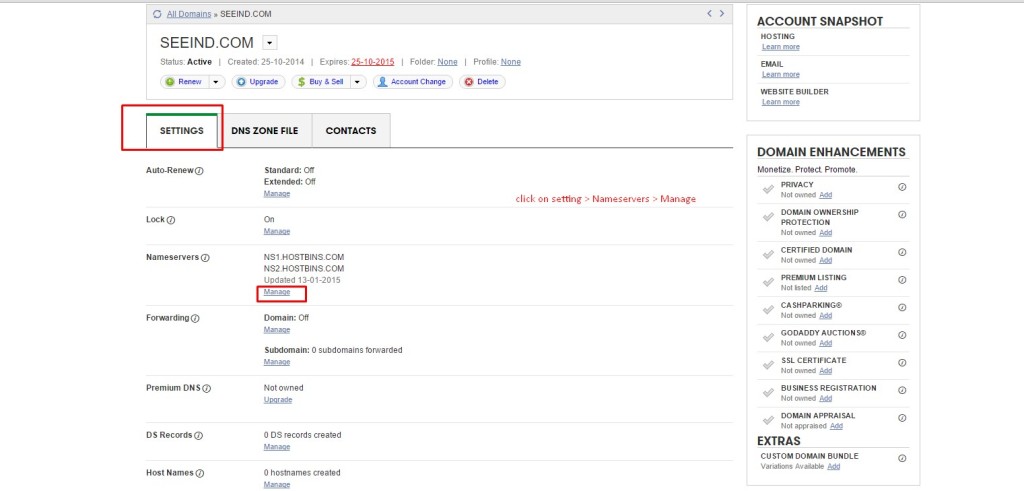
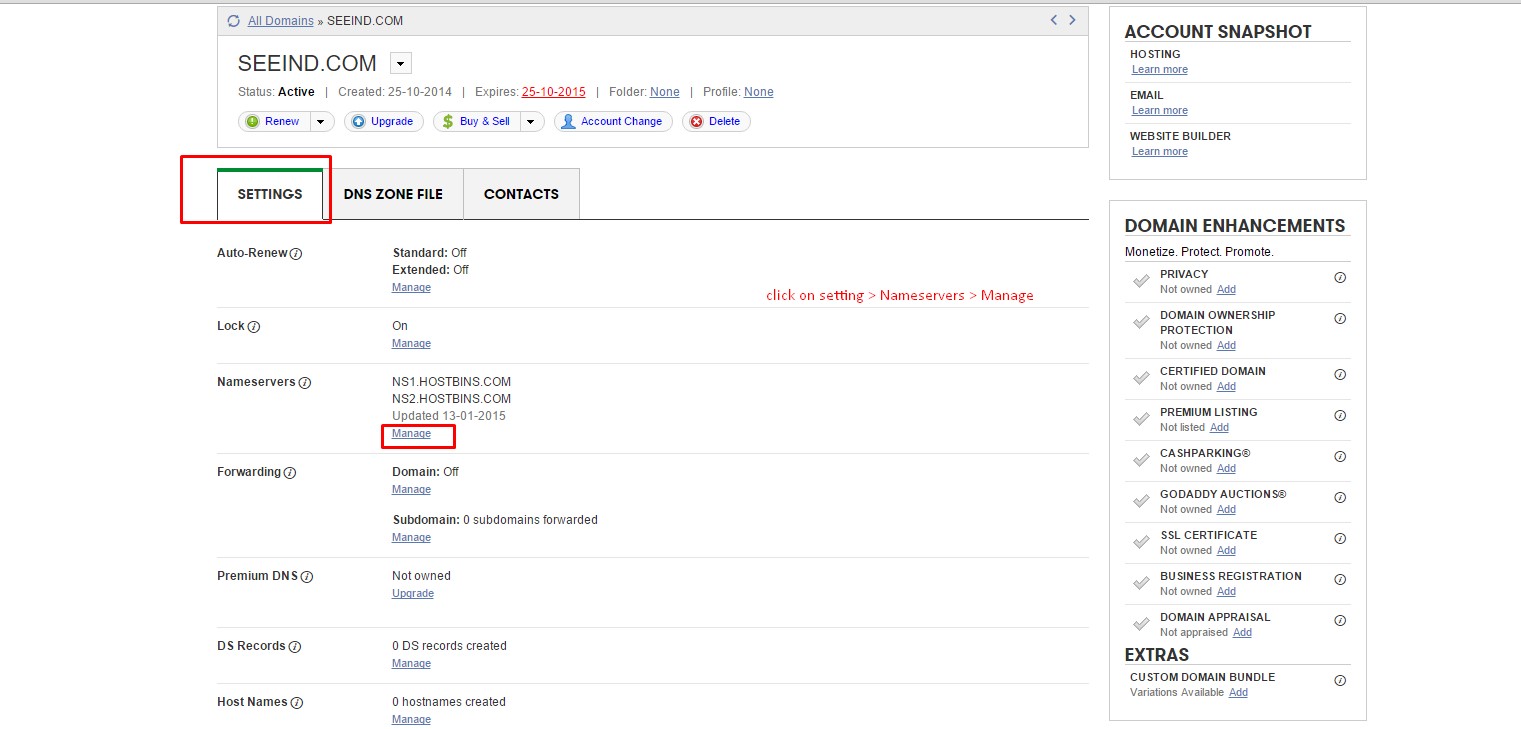
- Now open the other tab in which you had opened the domain setting , probably Godaddy, If not you are not using godaddy , find for Name server setting of your domain !
- Click on setting > Nameservers > Manage ( for godaddy users )
- Now Click on add name servers
- And add all the name server Details you get with your hostinger > details > nameserver setting
- Probably these namservers will look like
ns1.hostinger.in ns2.hostinger.in ns3.hosting.in ns4.hostinger.in - Now simply copy one by one and paste in the add name server boxes
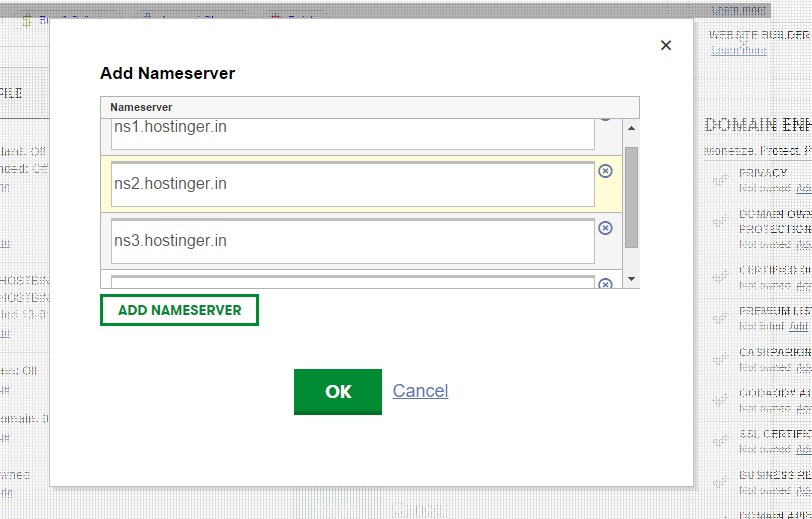
- You may need a extra box so click on add nameserver button and get a extra box added to the list !
- Now click ok and you are done with godaddy setting
- Now again open hostinger > accounts > manage and wait until The message that says name server are not pointing is removed.

- After it is gone you are ready to go for installing wordpress .
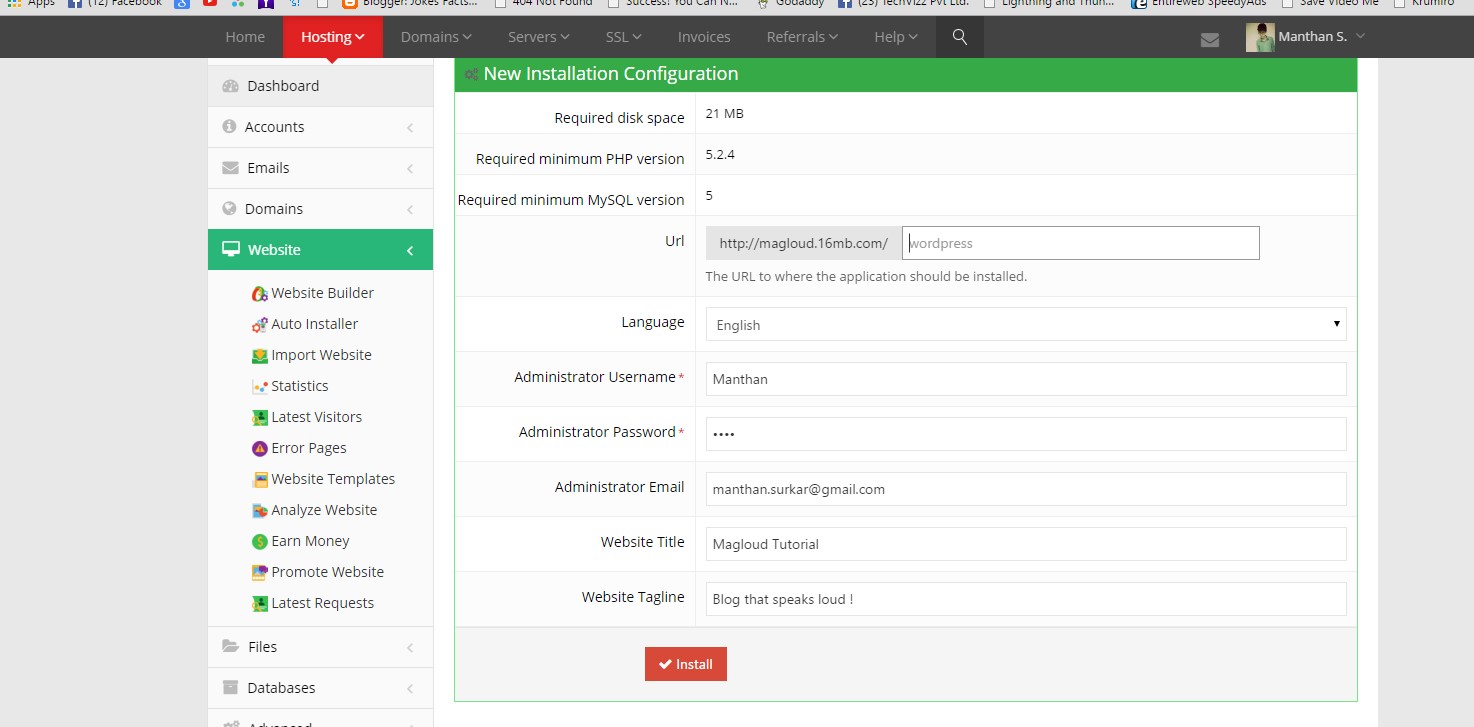
How to install WordPress ?
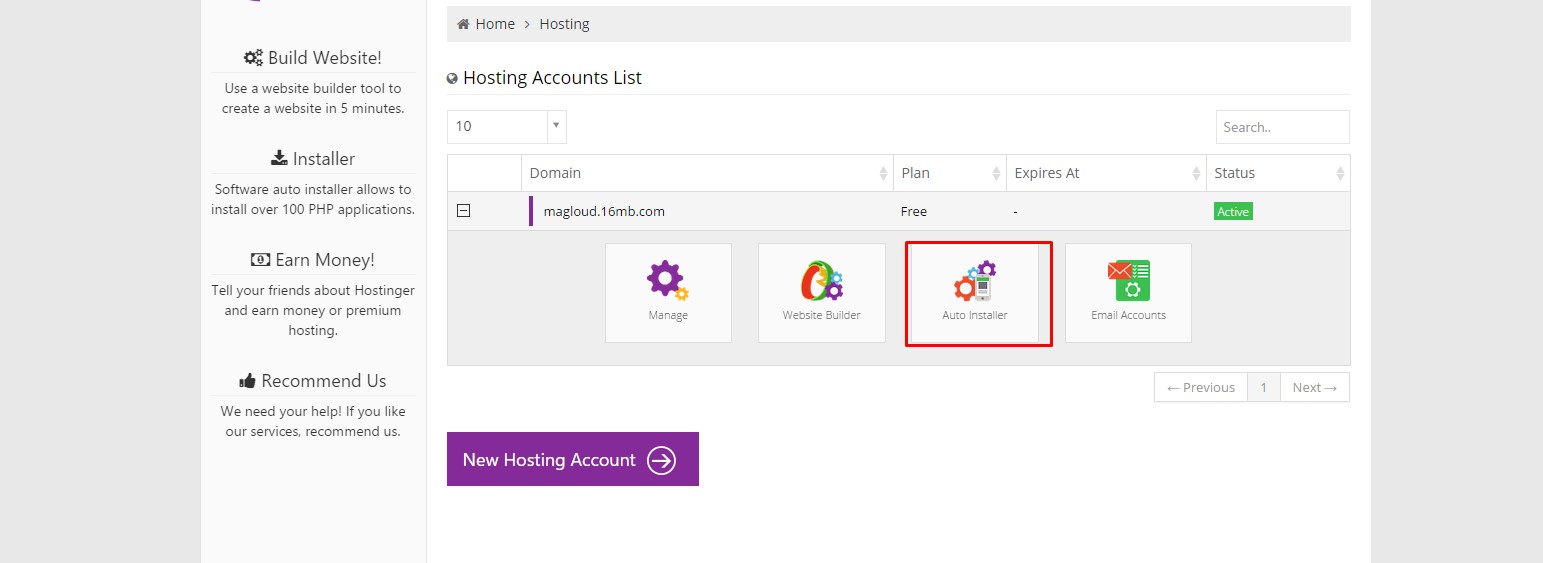
- After you are done with All these settings Go to hostinger > hosting > accounts
- As we did earlier , but this time click on auto installer button

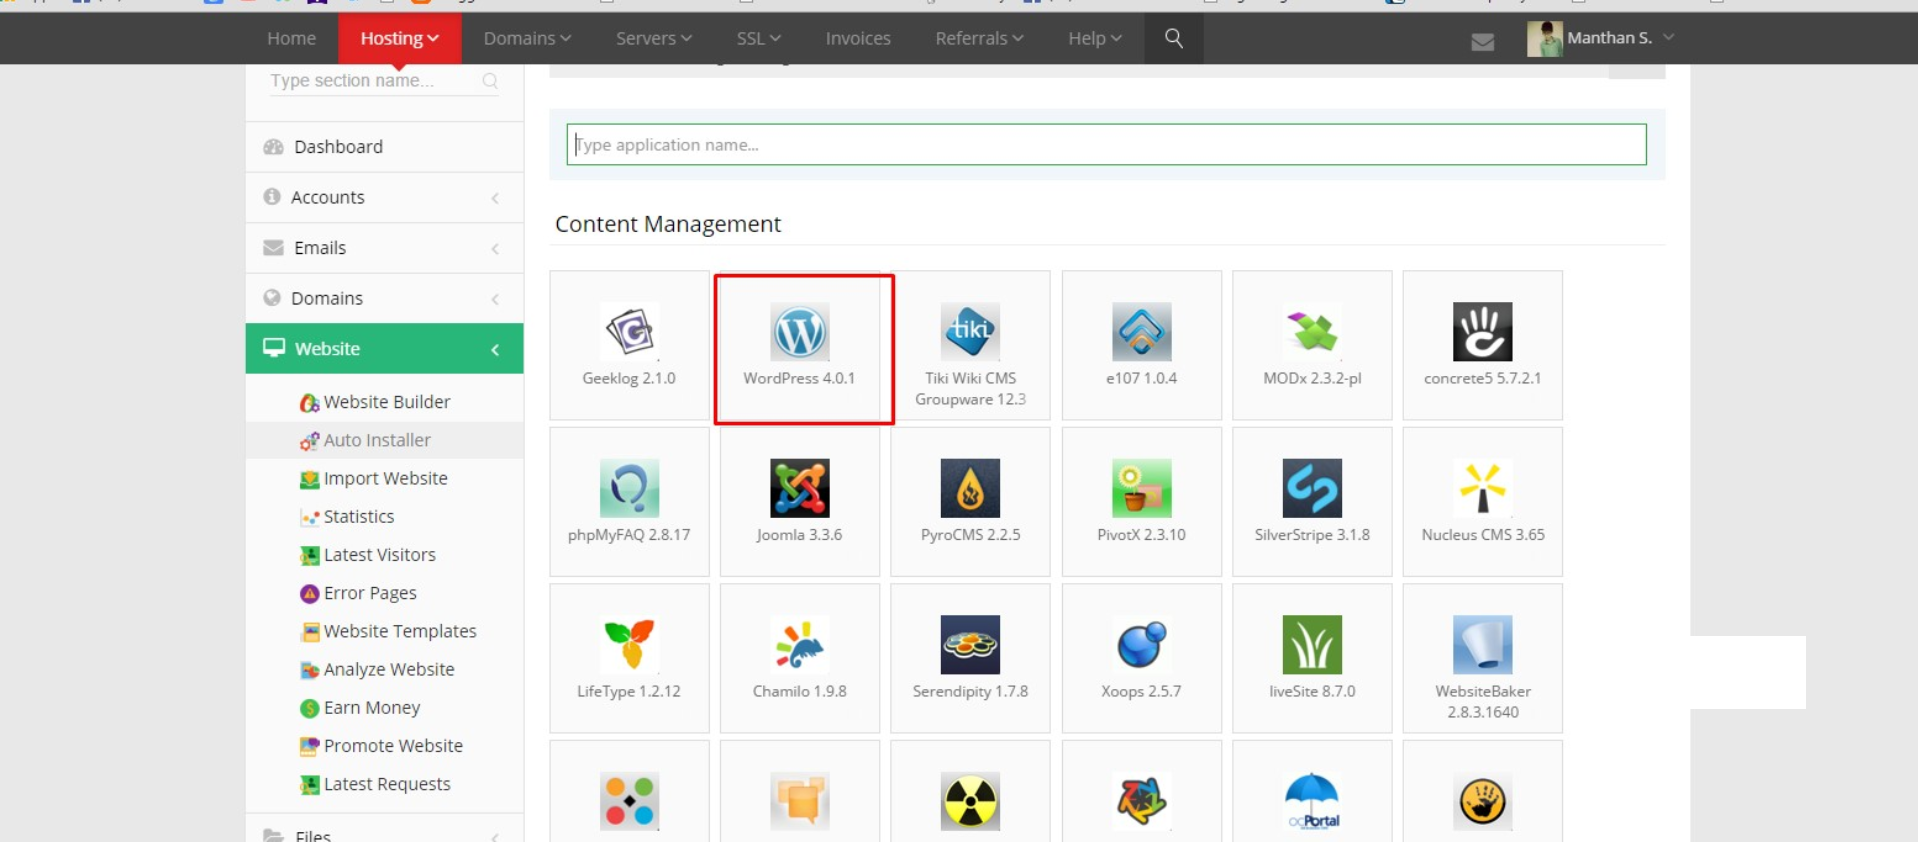
- Now click on wordpress
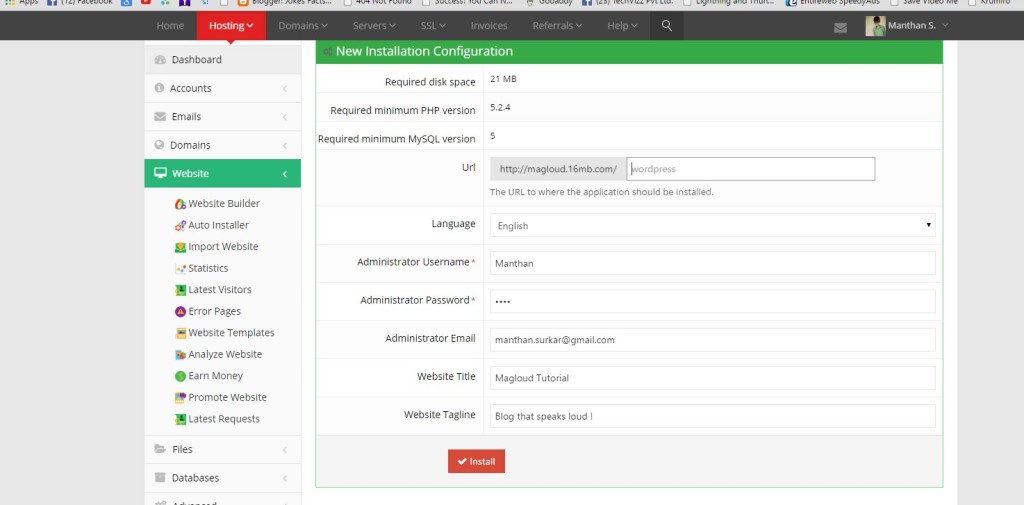
- Fill out all the details and click install
- Wait until it install WordPress
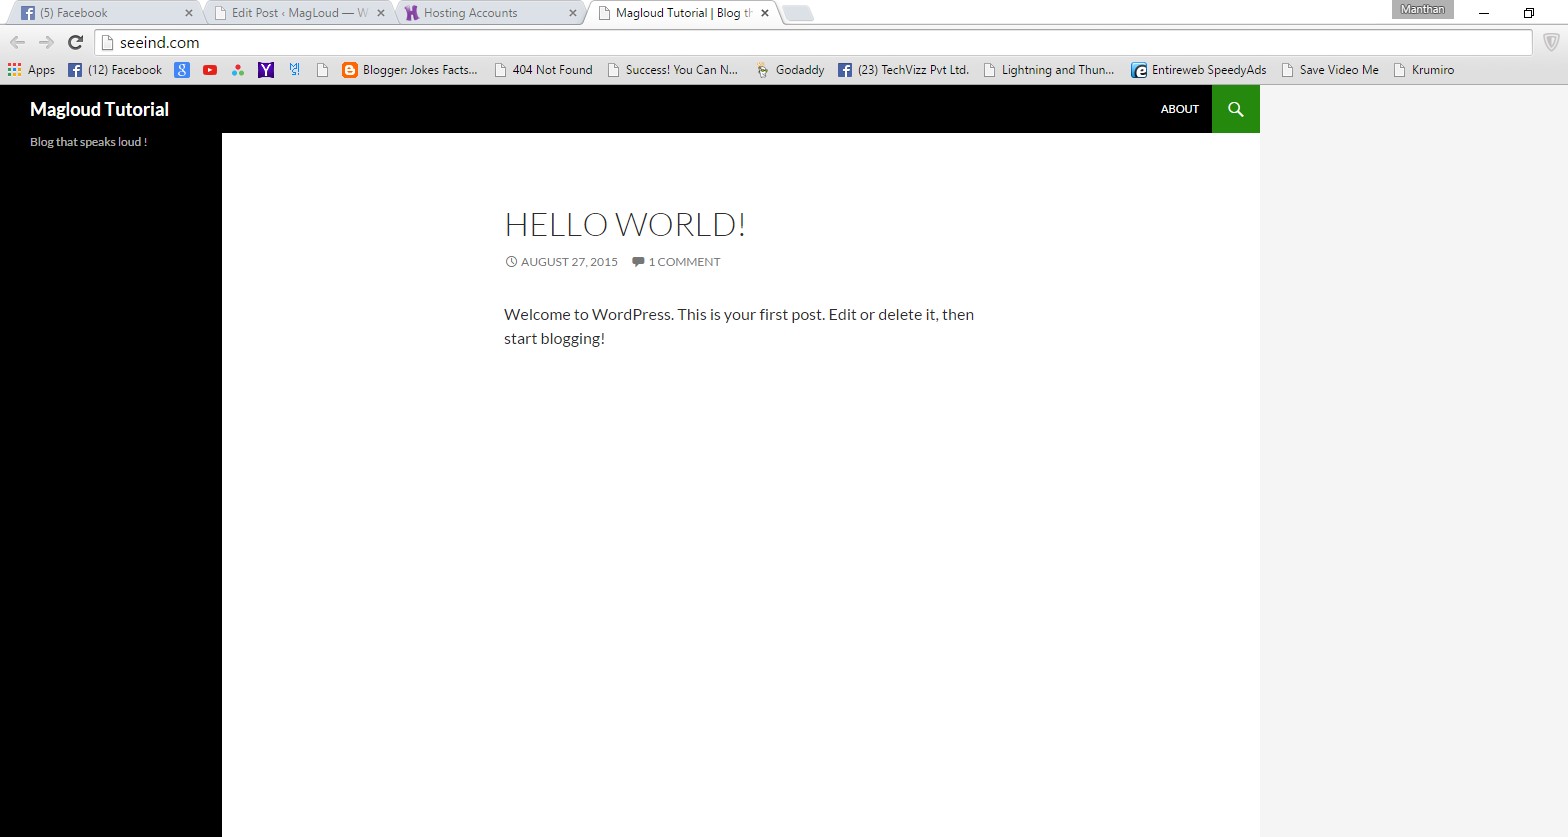
- To check if WordPress is successfully installed , open your website and check if it loads with WordPress title you gave , and you will notice some hello post.
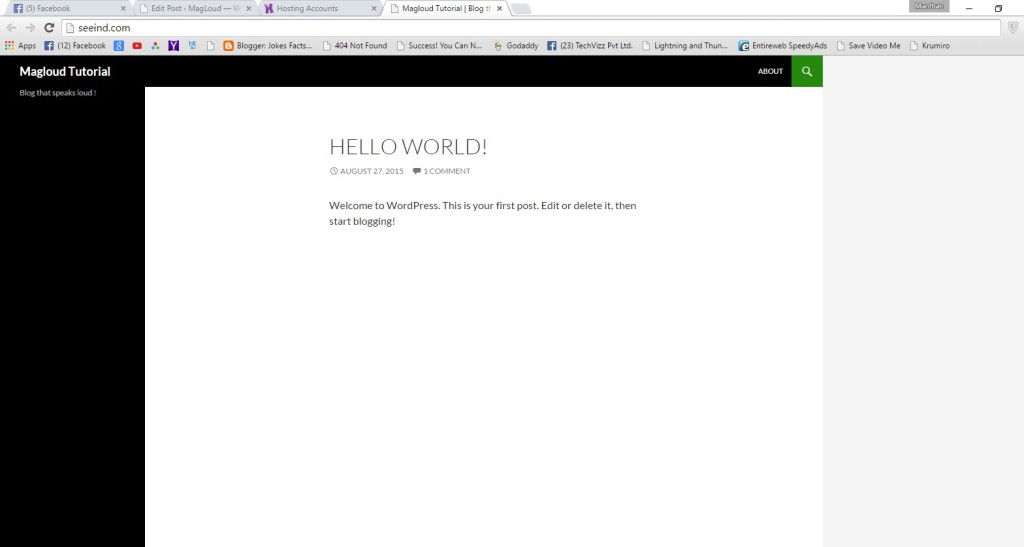
- If it successfully loads the page , Congo you have installed wordpress
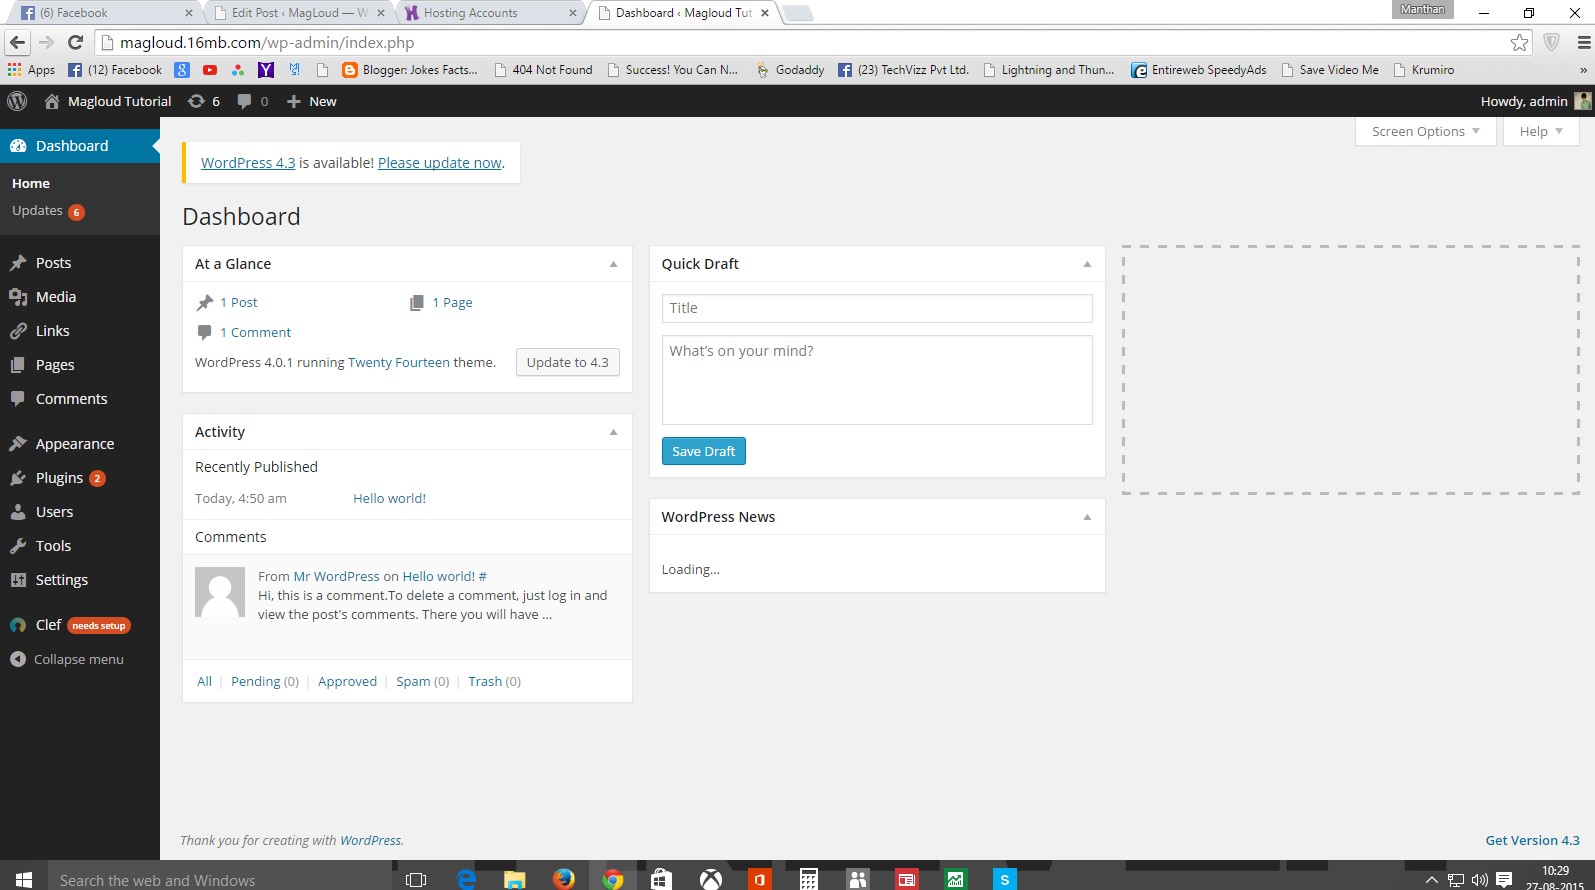
- Next is open WordPress Dashboard or admin panel for that go to Yourdomain.com/wp-login.php , Or simple add /wp-login.php after your website name and press enter
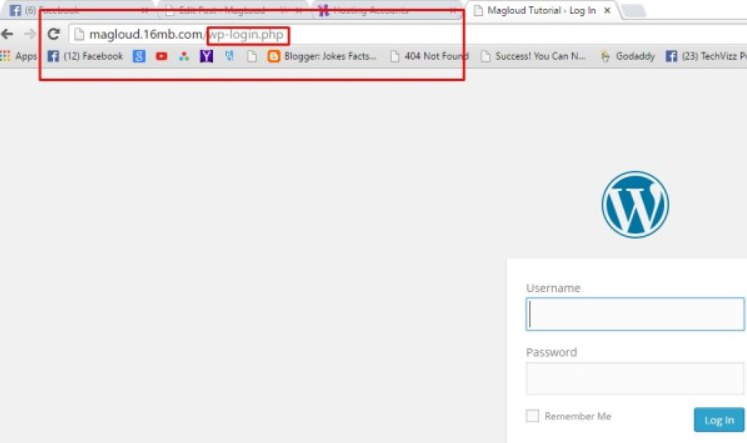
- Now enter the username and password you entered while installing wordpress , remember in step 4.
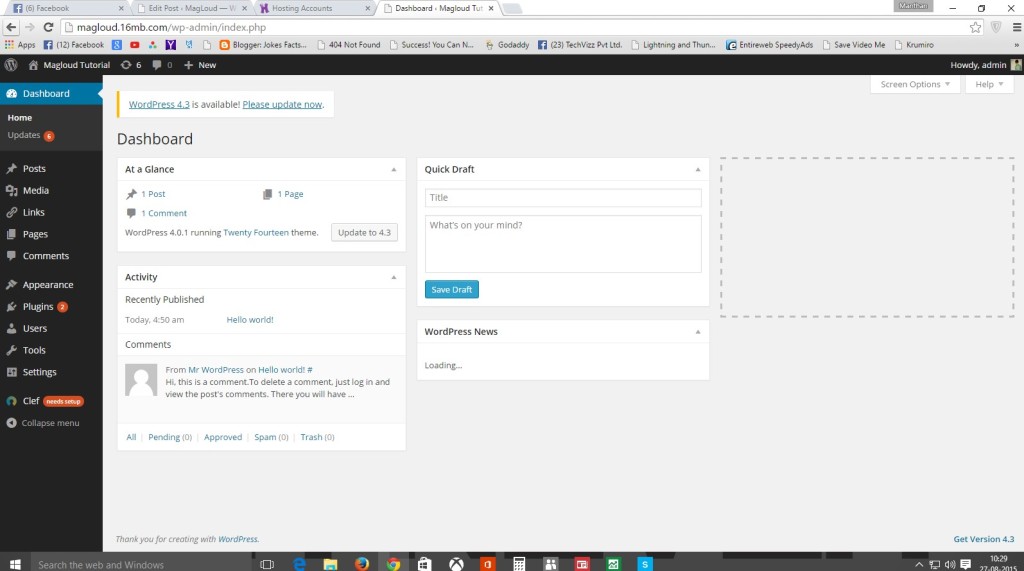
- After you login update your word-press version and yeah you are good to go with wordpress.
So whats next?
This is all how you Create a WordPress blog for free , but you know If you are seriously into blogging this free hosting doesn’t work . It is possible you face a very high downtime and problems like Late support . So its good to use this until you are used to wordpress when are good to go for something big make sure you buy premium hosting .
Make sure you comment below the website you created after reading this tutorial !
Thank you for visiting truetricks and make sure you come back and subscribe to our email Newsletter !
Leave a Reply